Photo Editing in Photoshop – quick tutorial with most used photo editing tools.
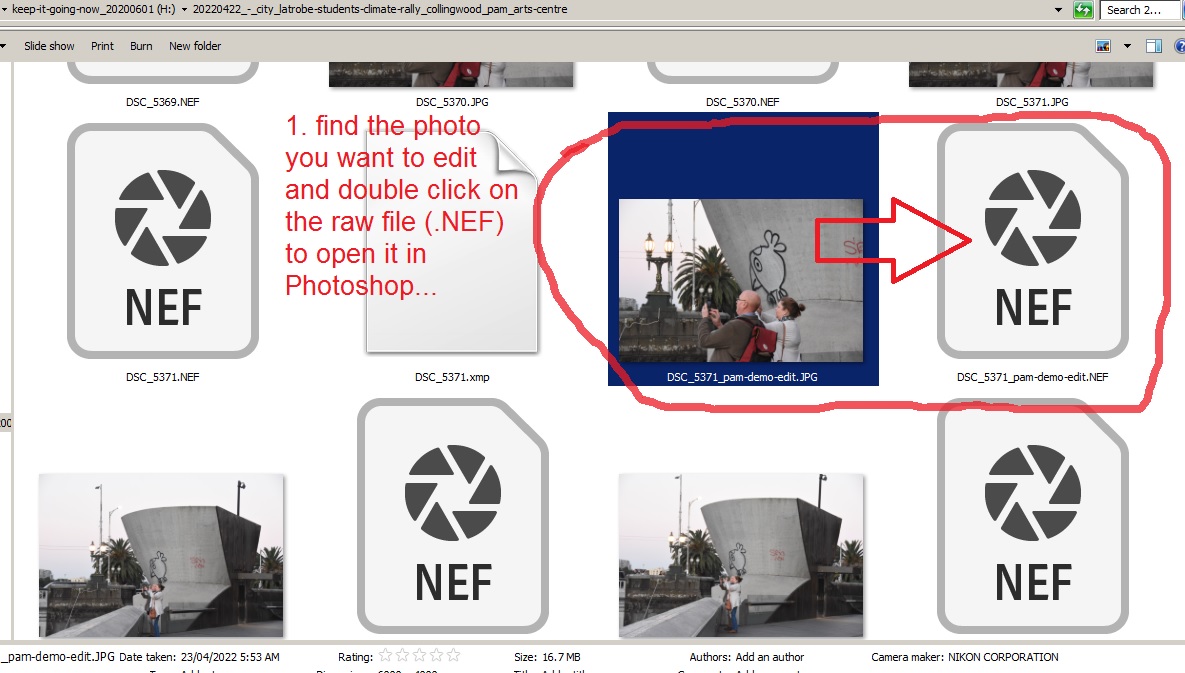
01.Find your photo to edit an click on the RAW file (.NEF, .cr2 etc) to open it:
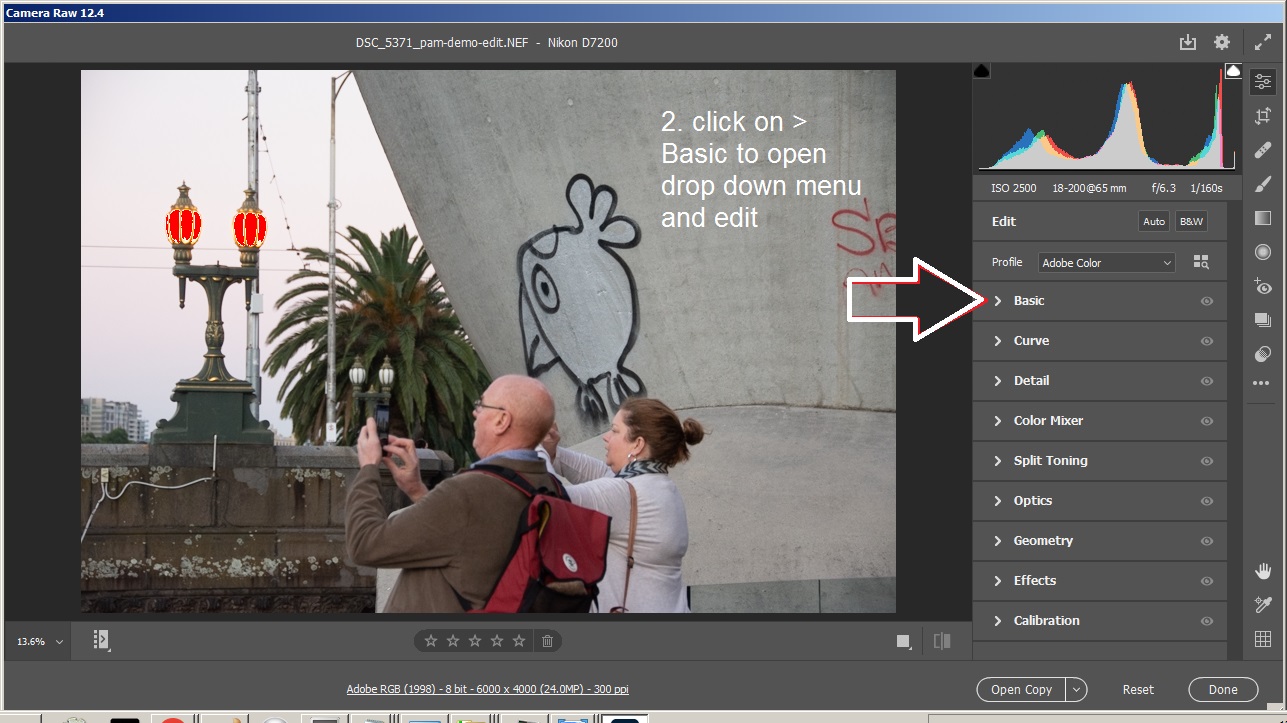
02.First click on Basic to open the drop down menu:
03. Adjust the highlights

04. Adjust the Clarity and dehaze*:
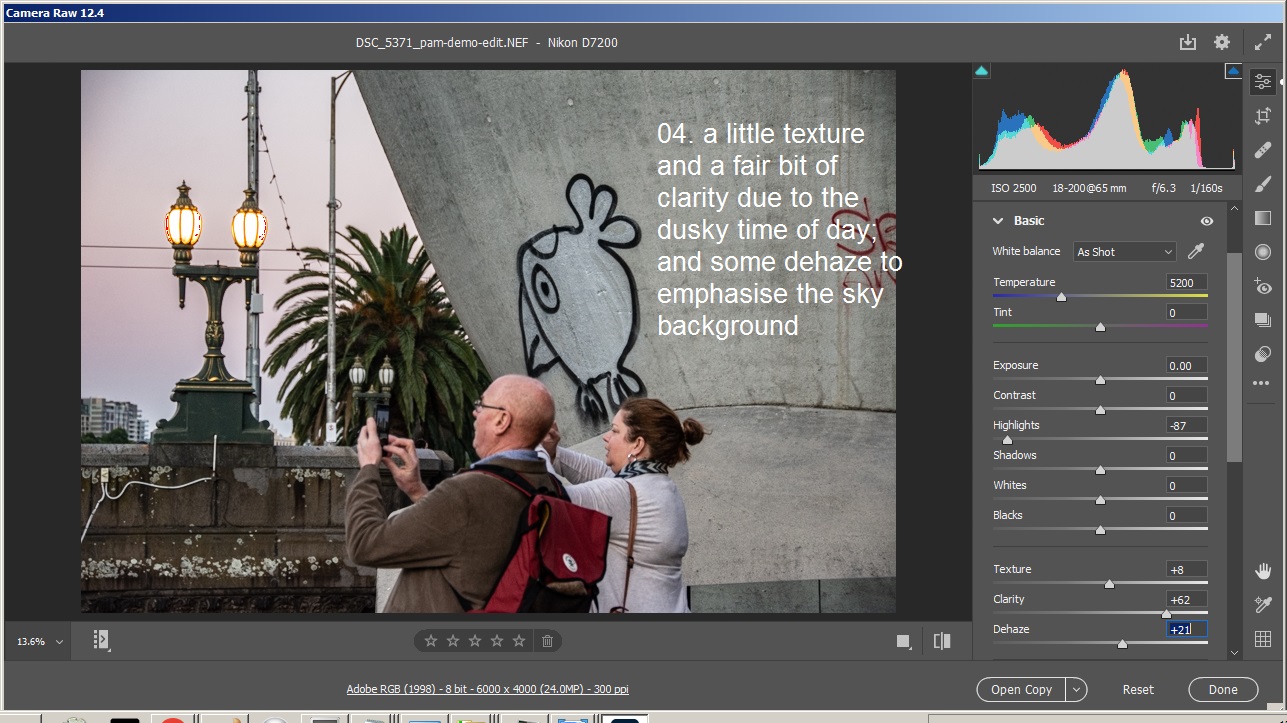
*these values are relative to your photo – they most likely wont be the same for every photo. You might need to boost shadows depending on what your photographing, how well your lights are set up, if the sun is behind your subject etc.
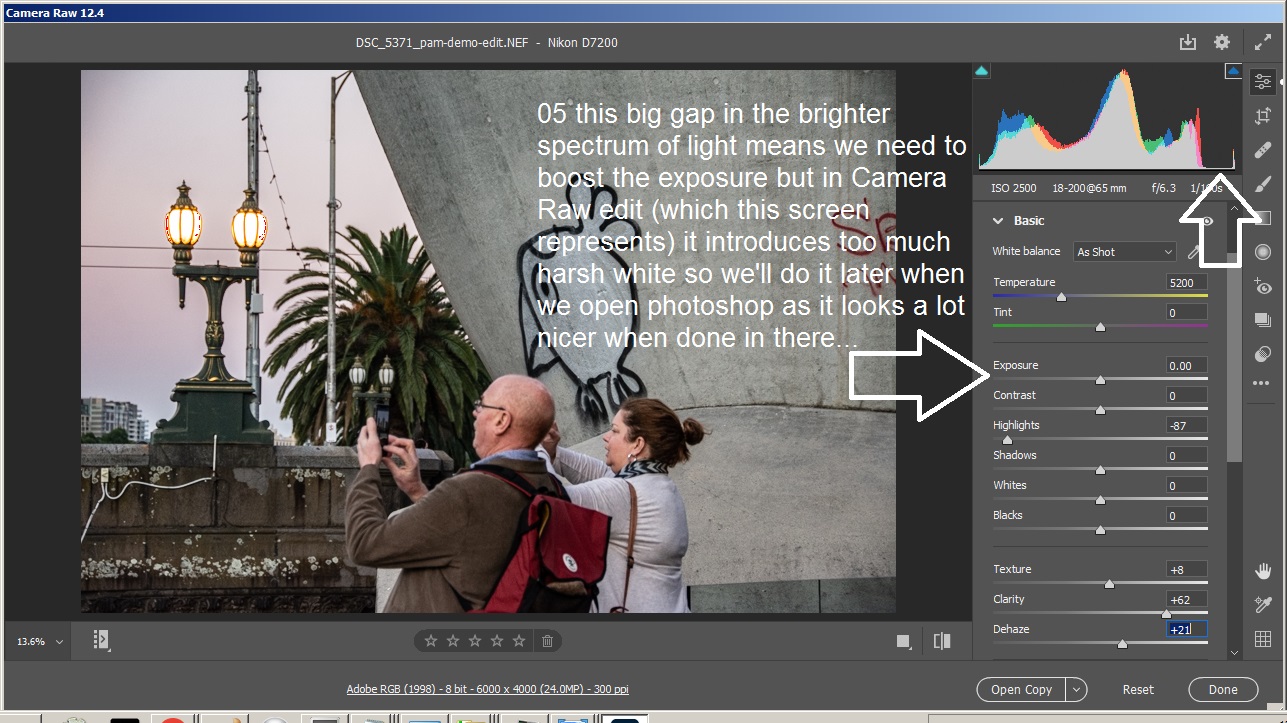
05. Exposure – not always adjusted in RAW edit due to poor algorithm
06. drag the slider down to reveal more options and click on >Optics

07. Click ‘Use profile corrections’ (hopefully your camera lens combo is there!)

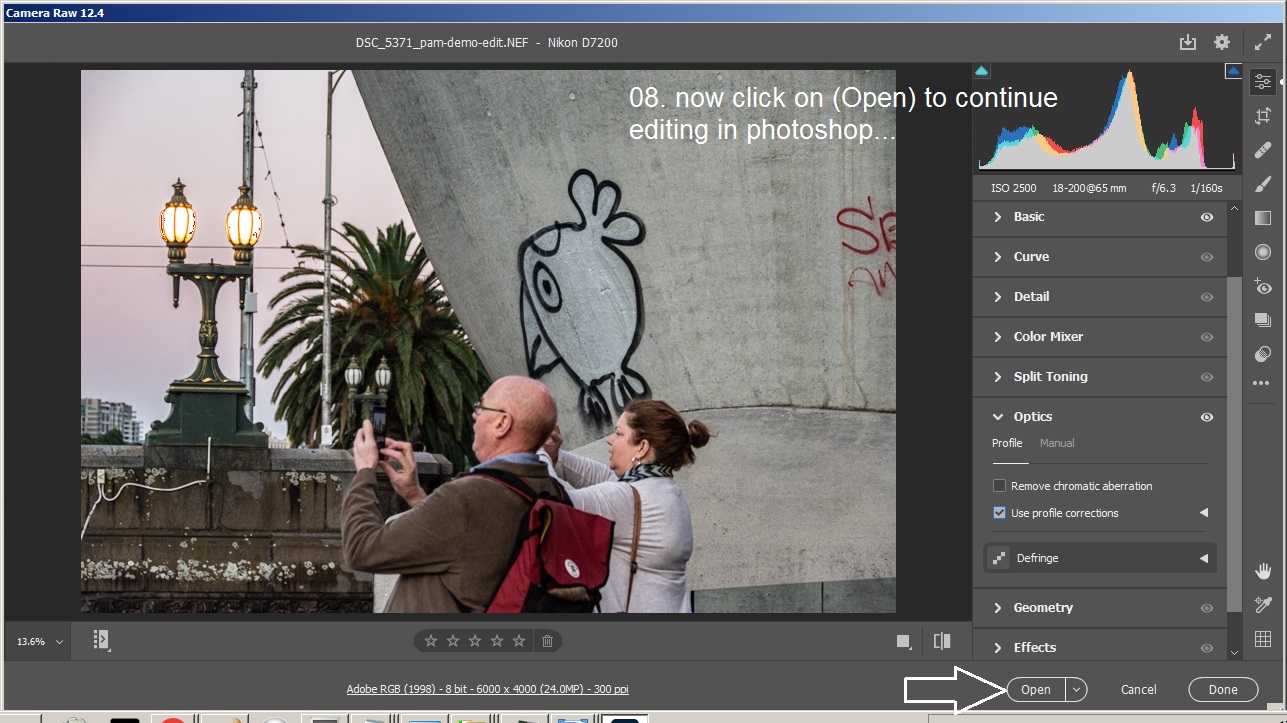
08. Click open to continue editing in Photoshop
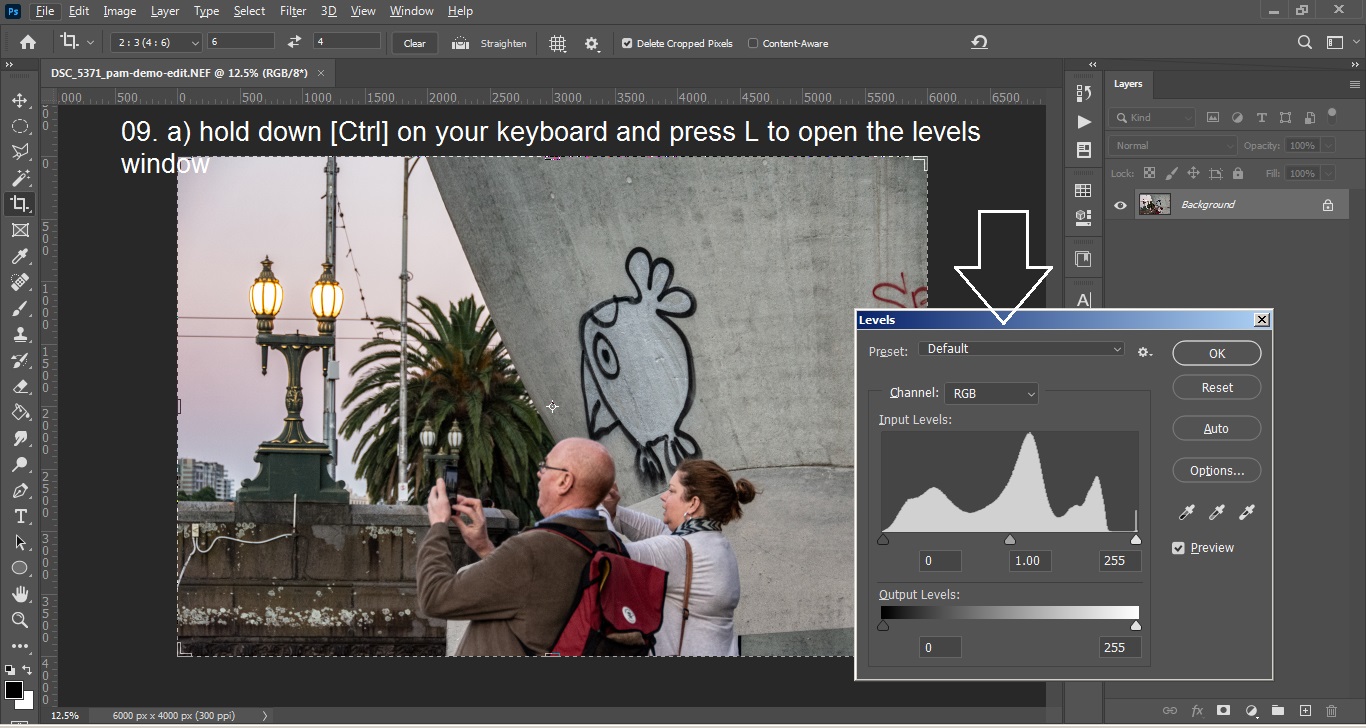
09. Now adjust your levels Ctrl + L
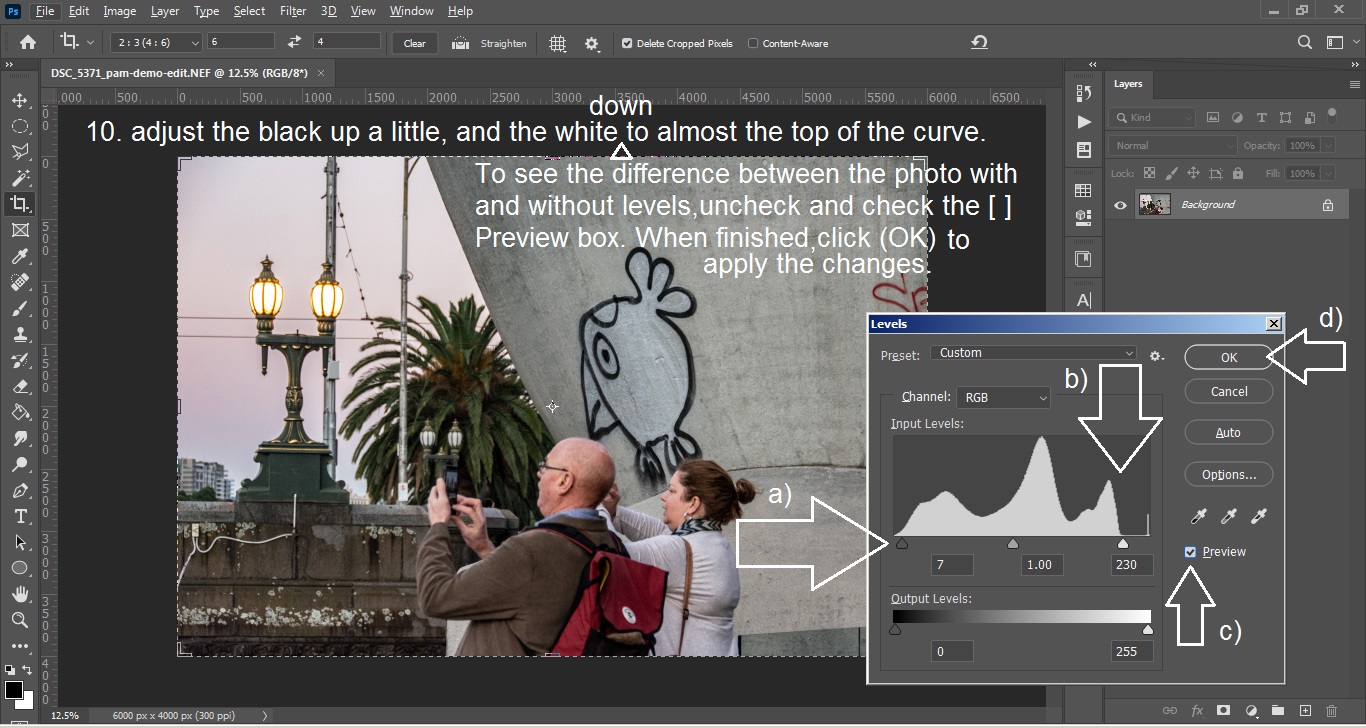
10. adjust the black up and the white down – to the edge of the levels curve. Uncheck and Check the [ ] Preview button to see the changes then when happy click ( OK )
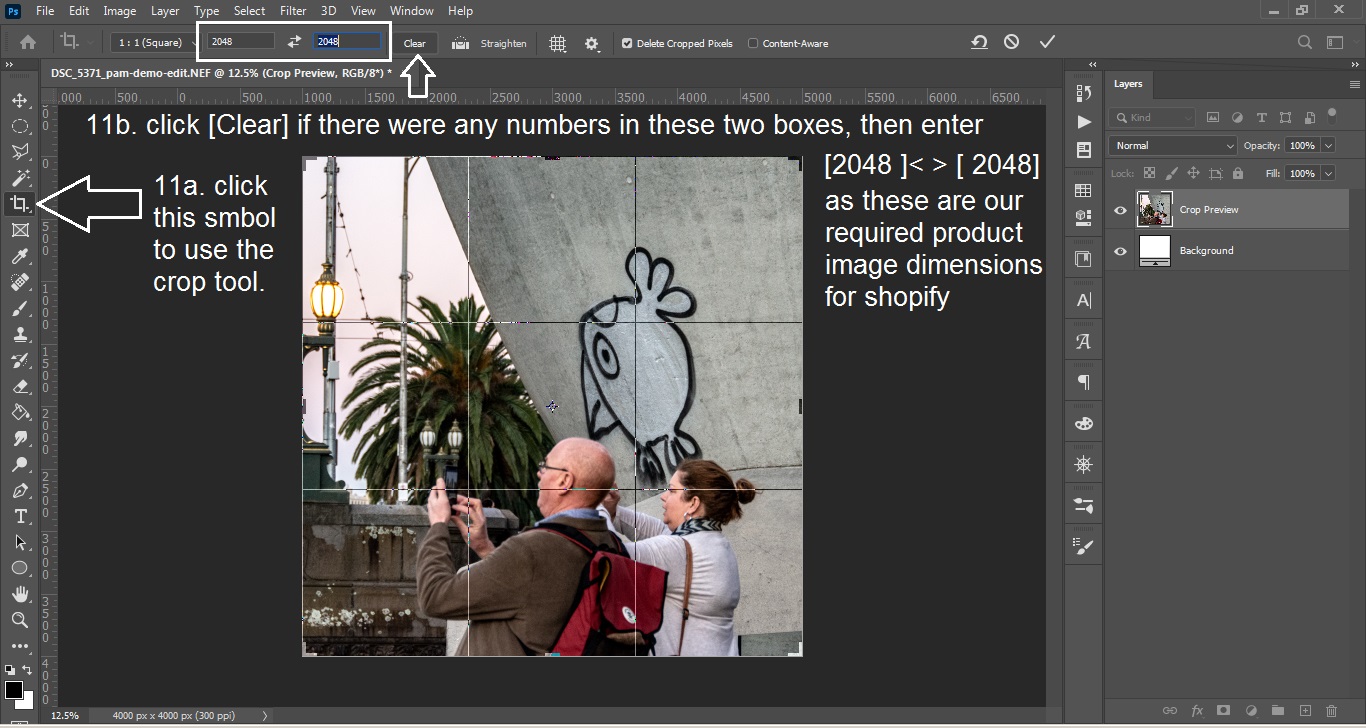
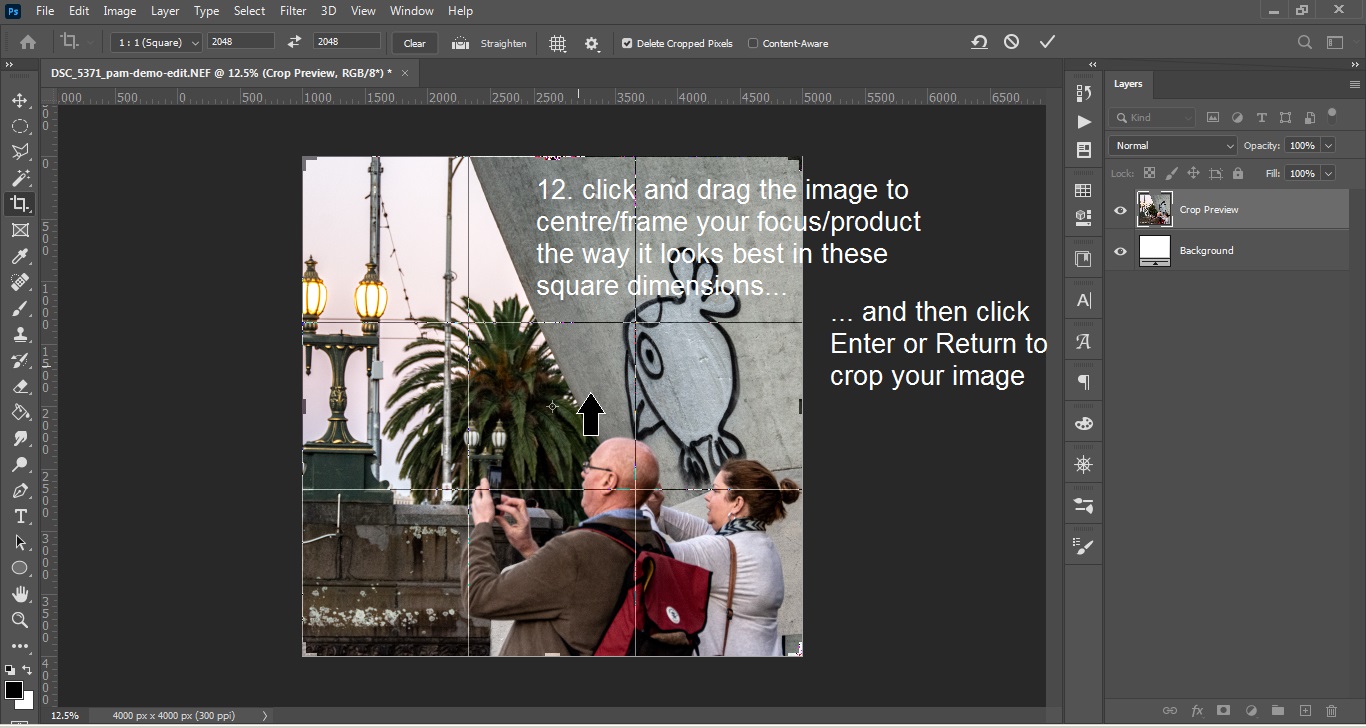
11. click the CROP tool icon and enter the square dimensions then click enter to adjust the area to crop (this e.g. is for Shopify product photos)
12. Click and drag your image to ccenter it for the squar crop the click enter or return to crop.
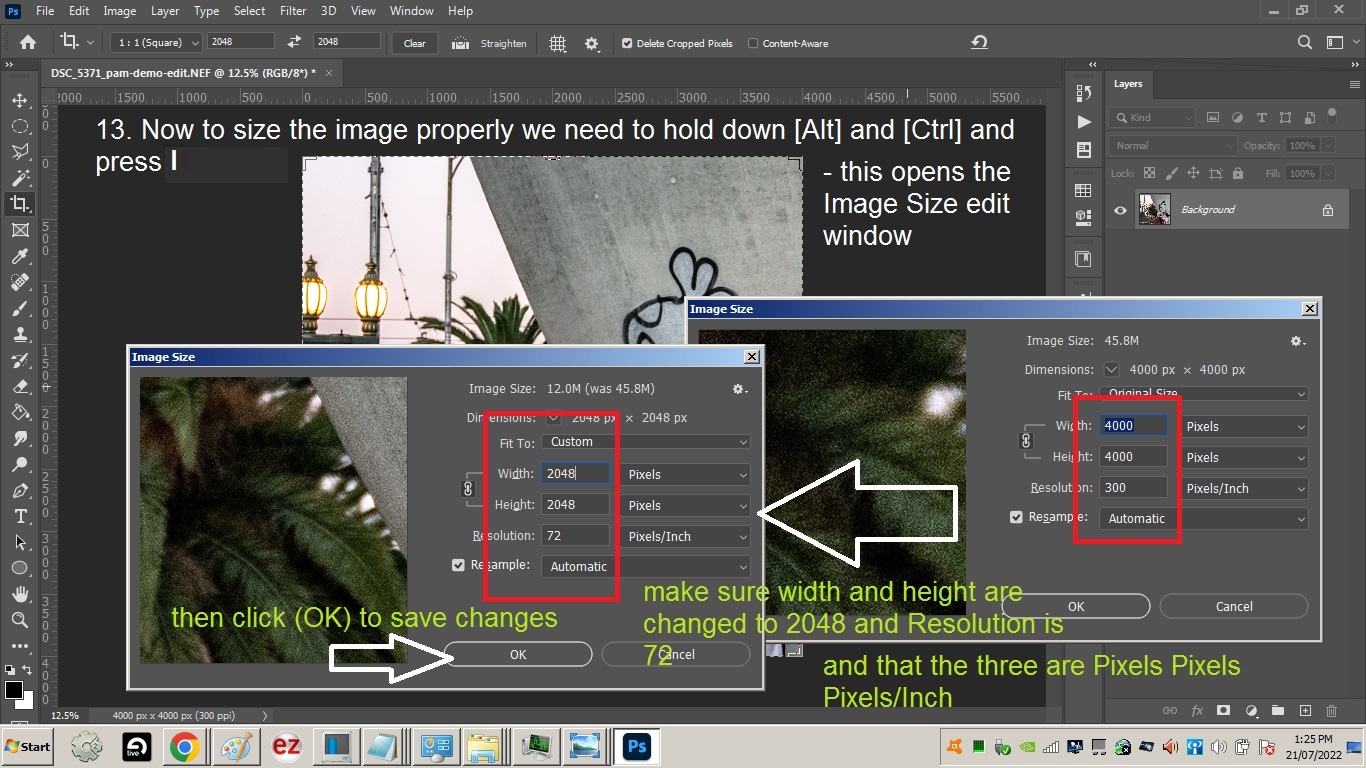
13. Now Alt + Ctrl + I to open Image Size window – make sure you have 2048×2048 pixels and 72 PPI then click ( OK )
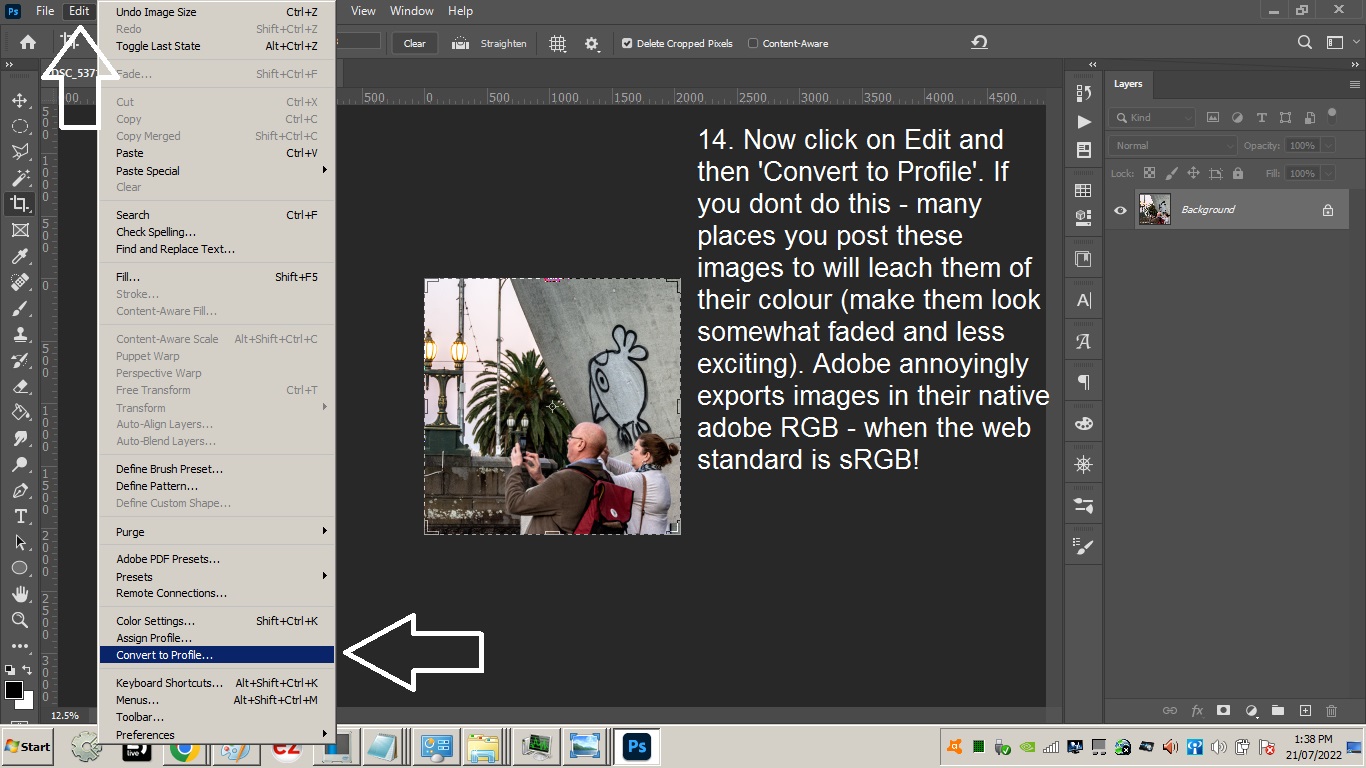
14. Now in the tool bar menu click on Edit and find ‘Convert to Profile’ – if you dont do this many platfoms you post your photo to will ‘leach’ your photo’s colour as it converts from adobe’s native adobeRGB to the web-standard sRGB
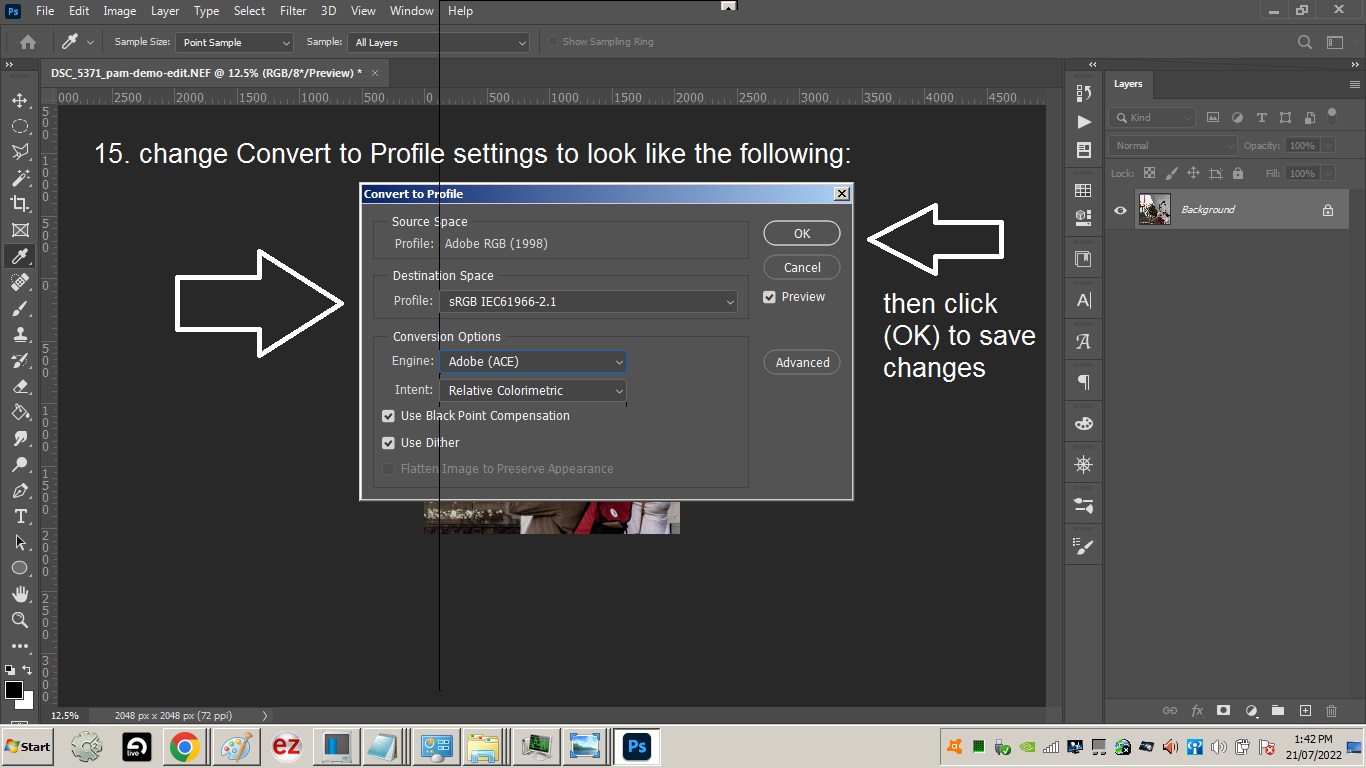
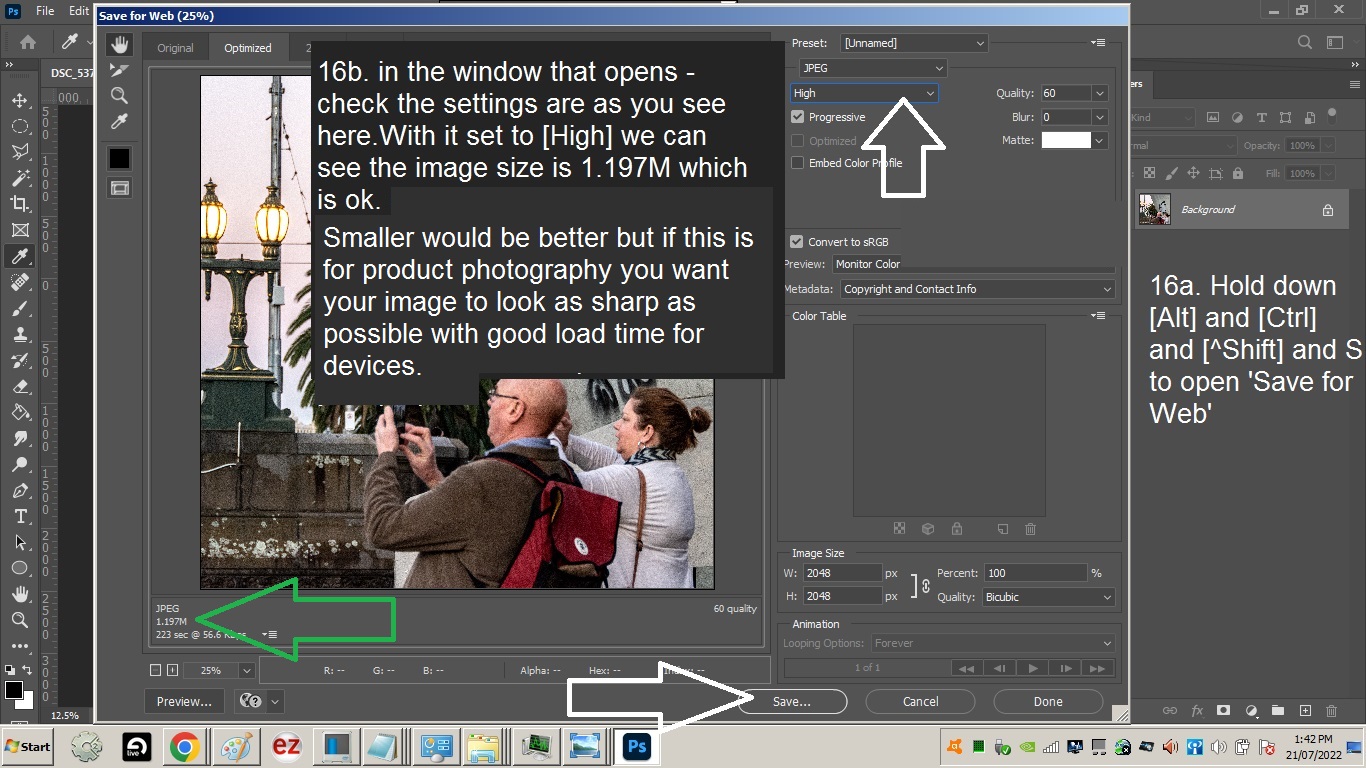
15. Make sure you have selected sRGB from the Profile: drop down menu and the other settings look as the screenshot:
16. Hold down Alt + Ctrl + ^Shift + S to save for the web. The smaller the better – remember though it depends where your photo is going – if its for a webstore – shopify for example you want it to be as sharp with nice edges and colour and minimal/no pixelation etc.
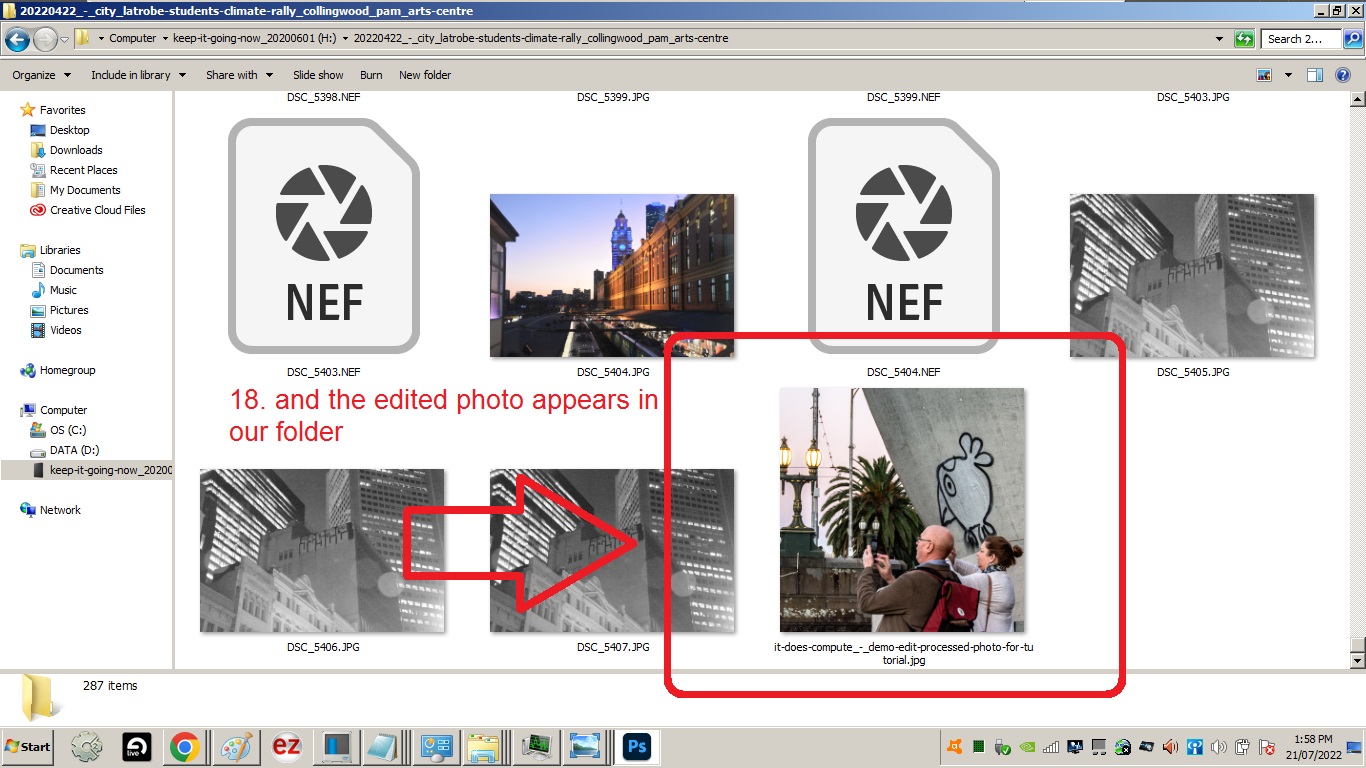
17. Now name your file appropriately e.g.: ‘it-does-compute_-_demo-edit-processed-photo-for-tutorial’ and click [Save]

18. Now you can see your edited photo in your folder! (Try and get into the habit of saving in the same project folder you edit from so you dont lose edited photos in random folders.)
edit, raw file, save for web, Alt + Ctrl + Shift + S, Convert to Profile, adobeRGB, sRGB, Image Size, Shopify, PPI, pixels, dehaze, levels, crop, Optics, exposure, highlights, clarity, shadows, info, help, tutorial, photoshop,